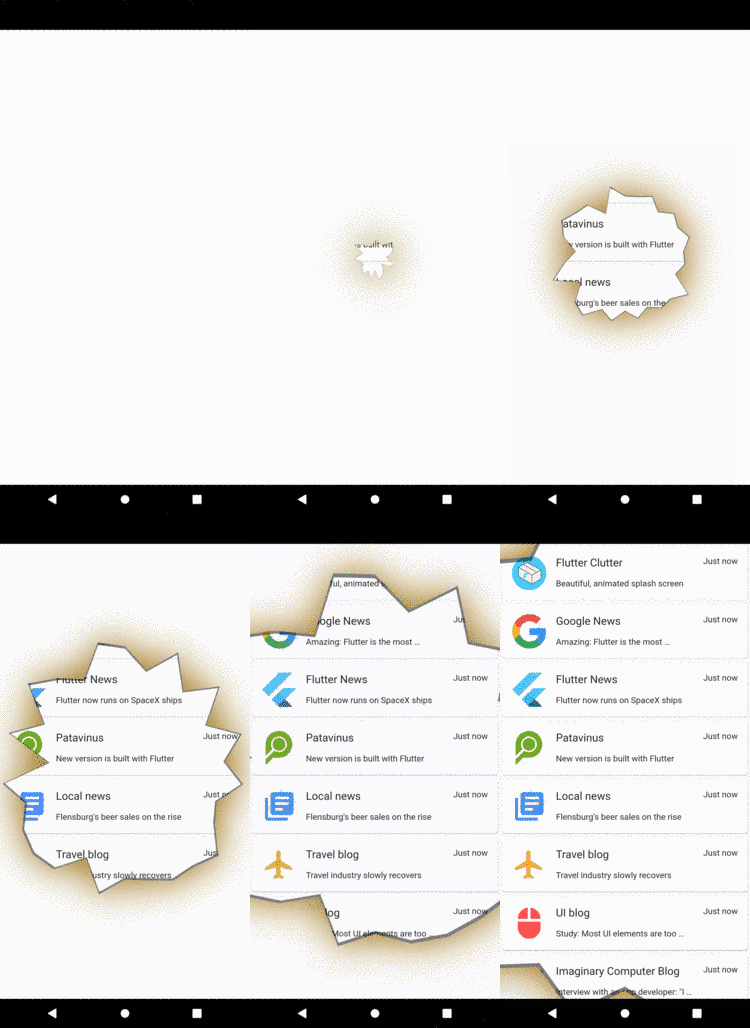
Perhaps you know this effect from the cult series “Bonanza” from television in the 1960s. If you don’t, imagine a sheet of paper burning from the middle to the edges of the viewpoint. This can be used as a splash screen or a screen transition. This is what it looks like:
The goal
Let’s describe what we want the result to look like so that we can work on the bullet points during the implementation:
- There is a solid (of a given color) that spans over the screen
- From the center, a hole is growing that reveals what is underneath
- The hole’s shape is a polygon shape that grows irregularly
- A black contour around the edge of the hole indicates the burning or burnt area
- In order to make the effect more realistic, a gradient around the hole is placed
Implementation
In order to make our burning paper animation configurable, we need to wrap it with a widget. This way, we can individualize the animation using the constructor’s arguments.
 1class BurningPaper extends StatefulWidget {
 2  BurningPaper({
 3    this.color = Colors.white,
 4    this.duration = const Duration(seconds: 3),
 5    this.pointAmount = 30
 6  });
 7
 8  final Color color;
 9  final Duration duration;
10  final int pointAmount;
11
12  @override
13  _BurningPaperState createState() => _BurningPaperState();
14}
15
16class _BurningPaperState extends State<BurningPaper> with SingleTickerProviderStateMixin {
17  AnimationController _controller;
18  Animation _animation;
19  List<double> points;
20
21  @override
22  void initState() {
23    super.initState();
24    // Here we need to initialize everything
25  }
26
27  @override
28  void dispose() {
29    super.dispose();
30    _controller.dispose();
31  }
32
33  @override
34  Widget build(BuildContext context) {
35    // Here we need to add the painter to the widget tree
36    return Container();
37  }
38}
What we want to make customizable is the color of the paper, the time it takes for the paper to be burnt and the amount of points that are used to describe the hole. The latter influences the shape of the hole. More points lead to more spiky shape.
We already prepared the methods initState() and build() which we are going to fill with our logic in the following.
But before we write the logic for any kind of information, we are going to write the heart of our logic: the painter. This piece of code is responsible for painting the burnt paper being dependent on the current state of the animation and the given parameters.
 1class BurningPaperPainter extends CustomPainter {
 2  BurningPaperPainter({
 3    @required this.color,
 4    @required this.points,
 5  });
 6
 7  Color color;
 8  List<double> points;
 9
10  @override
11  void paint(Canvas canvas, Size size) {
12    Path hole = Path();
13    Path outline = Path();
14    Offset center = Offset(size.width / 2, size.height / 2);
15
16    _buildPaths(hole, outline, center);
17    _paintPathsOnCanvas(size, outline, hole, canvas);
18  }
19
20  @override
21  bool shouldRepaint(CustomPainter oldDelegate) {
22    return true;
23  }
24}
We are going to have two paths: the hole itself and the outline which is almost identical with the hole but a little bit bigger and drawn in black.
There are two methods: _buildPaths and _paintPathsOnCanvas the former is responsible for turning the given point list into paths. The latter is used to actually paint them on the canvas.
 1void _buildPaths(Path innerHole, Path outerHole, Offset center) {
 2  for (int i = 0; i < points.length; i++) {
 3    double point = points[i];
 4    double radians = pi / 180 * (i / points.length * 360);
 5    double cosine = cos(radians);
 6    double sinus = sin(radians);
 7
 8    double xInner = sinus * point;
 9    double yInner = cosine * point - sinus;
10
11    double outlineWidth = point * 1.02;
12
13    double nxOuter = sinus * (outlineWidth);
14    double nyOuter = cosine * (outlineWidth) - sinus;
15
16    if (i == 0) {
17      innerHole.moveTo(xInner + center.dx, yInner * -1 + center.dy);
18      outerHole.moveTo(nxOuter + center.dx, nyOuter * -1 + center.dy);
19    }
20
21    innerHole.lineTo(xInner + center.dx, yInner * -1 + center.dy);
22    outerHole.lineTo(nxOuter + center.dx, nyOuter * -1 + center.dy);
23  }
24}
We iterate over every “point” which actually describes the distance (radius) from the center. With a little bit of trigonometry, we evenly distribute these radians across a hole circle, rotating every point a little bit further until the circle is completed.
In parallel, we draw the same hole with a 2 % higher distance for every point, which creates an outline around the inner hole.
To make our Path start at the right position and not at (0|0), we move to the first point before drawing the first line.
 1void _paintPathsOnCanvas(Size size, Path hole, Path outline, Canvas canvas) {
 2  Rect rect = Rect.fromLTWH(0, 0, size.width, size.height);
 3
 4  Path holePath = Path.combine(
 5    PathOperation.difference,
 6    Path()..addRect(rect),
 7    hole
 8  );
 9
10  Path outlinePath = Path.combine(
11      PathOperation.difference,
12      hole,
13      outline
14  );
15
16  Paint shadowPaint = Paint()
17    ..maskFilter = MaskFilter.blur(BlurStyle.outer, 32)
18    ..color = Color(0xff966400);
19
20  canvas.drawPath(holePath, Paint()..color = color);
21  canvas.drawPath(hole, shadowPaint);
22  canvas.drawPath(outlinePath, Paint()..color = Colors.black.withOpacity(0.5));
23}
Okay, now it’s time to actually draw the paths we just create on canvas. It’s important that before we draw them, we subtract them from a rectangle of the size covering the whole screen. Otherwise, there would be no transparency showing the underlying screen, but instead just a growing polygon in the given solid color.
In order to mimic a half-burnt paper around the actual hole, we draw a shadow-like object around the hole. To achieve this effect, we use a MaskFilter called blur. We need to set the blurStyle to outer because we don’t want it to cover the hole. We then draw the paths in the following order: first the path that has the hole at the center. On top of that the shadow path that mimics the half-burnt area. Last but not least we draw the outline.
Now that we have defined the behavior of the painter, we still need to add it to the widget tree under our BurningPaper widget.
 1@override
 2Widget build(BuildContext context) {
 3  return Container(
 4    width: double.infinity,
 5    height: double.infinity,
 6    child: CustomPaint(
 7      painter: BurningPaperPainter(
 8        color: widget.color,
 9        points: points
10      )
11    )
12  );
13}
In order to cover the whole size of our screen, we use a Container with infinite dimensions and put the CustomPaint below this widget in the tree. We forward the color and points from the surrounding widget to the CustomPaint.
Now let’s try it out by inserting our BurningPaper widget at the root node of the widget tree:
 1@override
 2Widget build(BuildContext context) {
 3  return Material(
 4      child: Stack(
 5        children: <Widget>[
 6          Container(
 7            decoration: BoxDecoration(
 8                gradient: RadialGradient(
 9                  colors: [Colors.orange, Colors.orangeAccent]
10                )
11            ),
12            child: Center(
13              child: Text(
14                "Burning\nPaper\nEffect",
15                style: TextStyle(fontSize: 48, color: Colors.white),
16                textAlign: TextAlign.center,
17              )
18            ),
19          ),
20          IgnorePointer(
21              child: BurningPaper(
22                //color: Theme.of(context).accentColor
23              )
24          )
25        ]
26      )
27  );
28}
When we try it out, we see nothing but the underlying widget saying “burning paper effect”. Why is that?
It’s because our point array does not have the ability to grow, yet. Let’s go and add this functionality.
 1@override
 2void initState() {
 3  super.initState();
 4
 5  points = [for (var i = 0; i < widget.pointAmount; i+=1) 0];
 6
 7  _controller = AnimationController(
 8    duration: widget.duration,
 9    vsync: this,
10  );
11
12  _animation = Tween<double>(begin: 0, end: 1).animate(
13    CurvedAnimation(
14      parent: _controller,
15      curve: Curves.easeIn,
16    ),
17  );
18
19  _controller.forward();
20
21  _controller.addListener(() {
22    setState(() {
23      for(int i = 0; i < points.length; i++) {
24        double newRandomPoint = points[i] + Random().nextDouble() * _animation.value * 100;
25        points[i] = newRandomPoint + _animation.value / 2;
26      }
27    });
28  });
29}
Instead of letting the distance of the points to the center of the whole grow completely randomly, we use a Tween as a base. We use a CurvedAnimation that uses an easeIn curve. Everytime the controller senses a change, we take the last value and add to it the average of a random value and the current value of the tween.
The random value is just a double (between 0.0 and 1.0) multiplied with the current animation value times 100.
Result
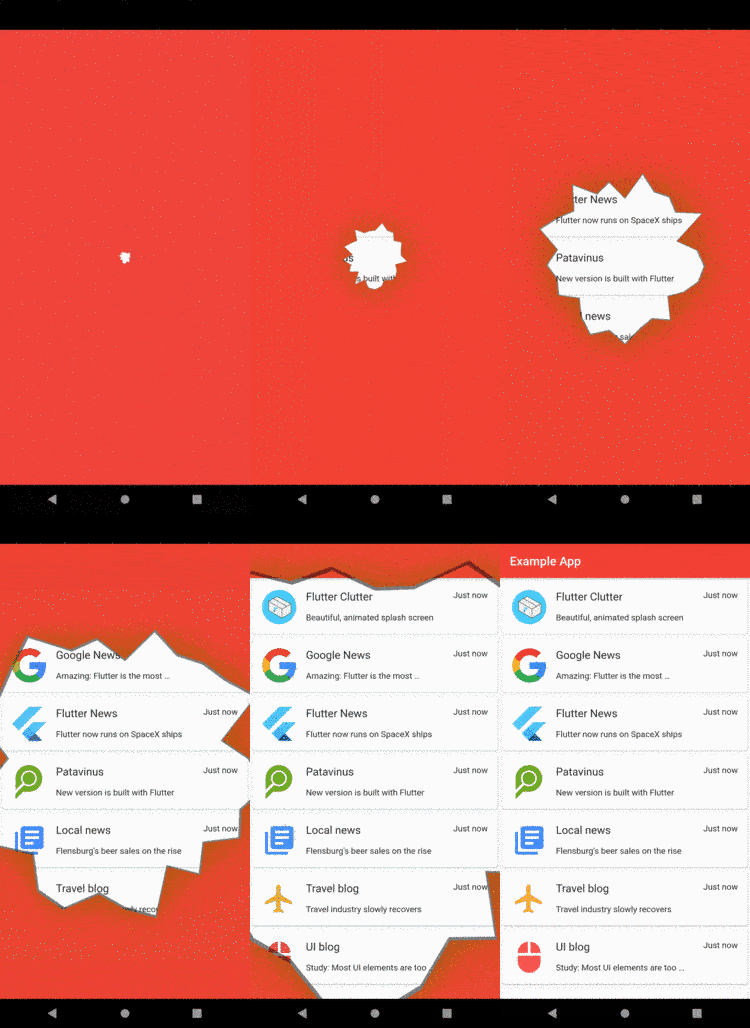
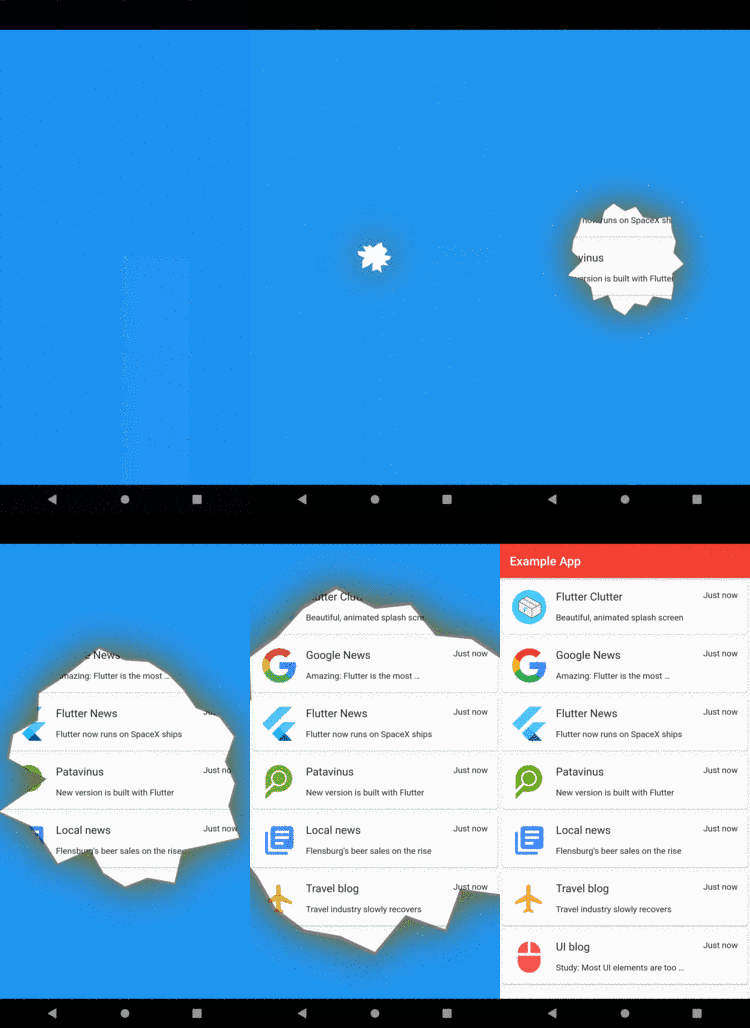
Let’s have a look at the result using different colors for the paper:

Conclusion
With a CustomPainter and a list of Integers that are randomly increment on every animation step, we were able to quickly create the illusion of a hole burning into the center of a sheet of paper. By using Path.combine and the difference of the hole canvas and the hole that is defined by the array of Integers (representing the radius) we were able to achieve the desired result with a manageable number of code lines. The effect is customizable in terms of its color and the duration of the animation.


Tommie Carter
Marc
In reply to Tommie Carter's comment
Cold Stone